Want to add an email waitlist to out-of-stock products in your WooCommerce store?
“Notify When Back in Stock” lists come with a couple of advantages.
For example, having easy access to a waitlist makes your customers feel valued and cared for, which can help foster a sense of loyalty.
Stock update emails also encourage them to return to your store when the product is restocked, boosting your sales and increasing the chances of repeat business.
Since WooCommerce doesn’t include the ability to add email waitlists to product pages, you’ll need to use a third-party tool to implement it.
In this tutorial, I’ll show you how to use a powerful WooCommerce plugin called Merchant Pro to add the “Notify When Back in Stock” functionality to your store.
1. Install and Activate the Merchant Pro Plugin
Merchant Pro is an all-in-one WooCommerce plugin that offers 40+ eCommerce modules designed to improve customer experience and boost your sales and revenue collection.
Its Waitlist module allows you to add a stylish and user-friendly “Notify When Back in Stock” form to your out-of-stock and backorder products:
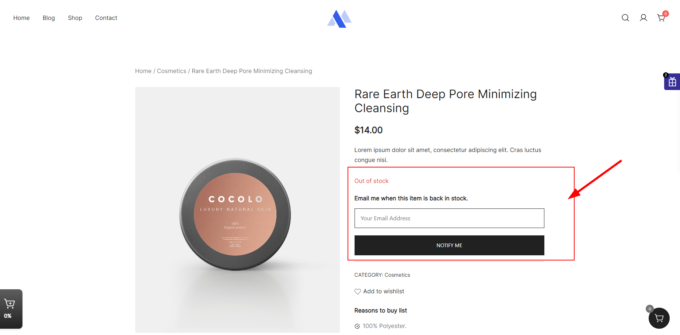
Once the product is back in stock, Merchant Pro will automatically inform your subscribers via email.
To add the Waitlist module to your store, first, you need to purchase, install, and activate the Merchant Pro plugin:

If you need help with the installation process, follow our Quick Start Guide to Merchant Pro, which explains everything in detail.
2. Open the Waitlist Module
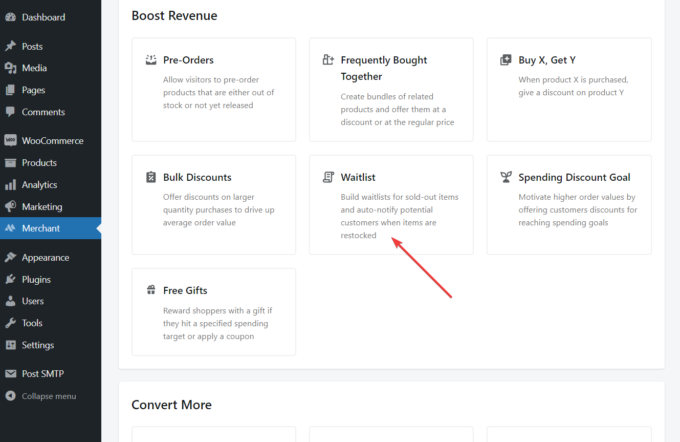
To open the Waitlist module, click the Merchant menu located on the left side of your WordPress dashboard.
Then, find the Boost Revenue section and select the Waitlist option:
3. Configure the Waitlist Module
Inside the admin page of the Waitlist module, you’ll find three types of settings:
- Form settings
- Email settings
- Shortcode settings (for developers)
Each option comes with a sensible default, but you can change it if you want to.
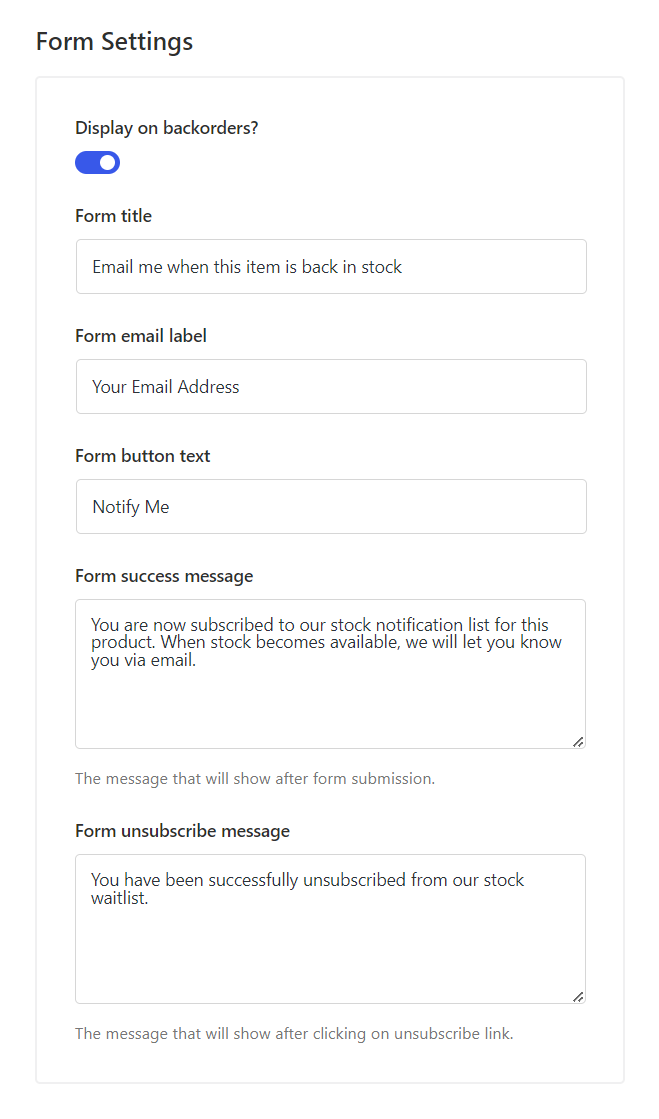
The Form Settings section allows you to show the waitlist form for backorder products too (it’s shown for out-of-stock products by default) and configure the text strings of the module, including the title, label, button text of the waitlist form and the success and unsubscribe messages:
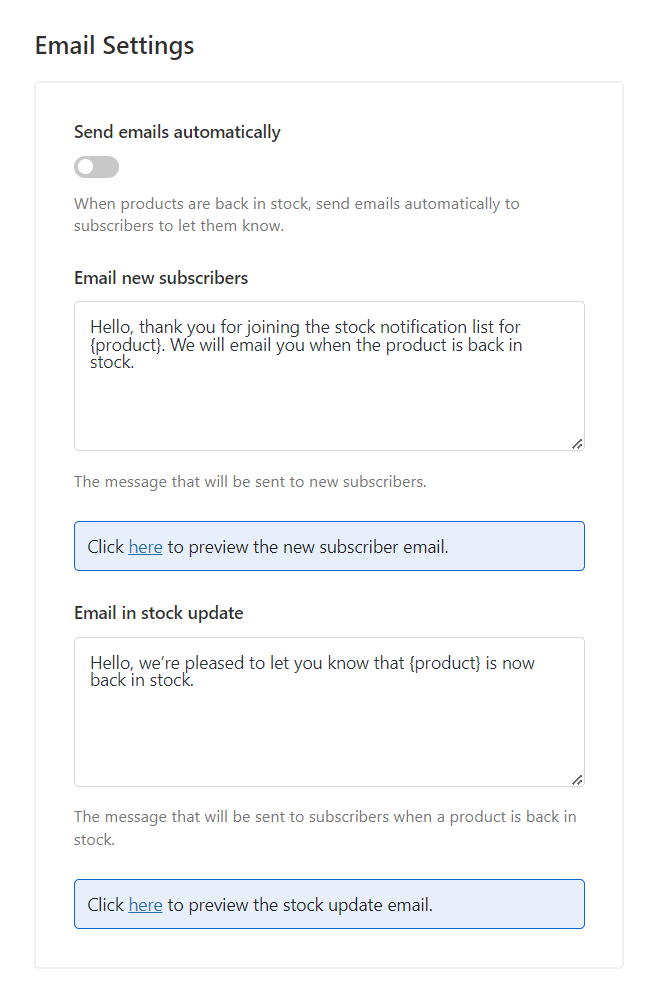
The Email Settings section lets you set up Merchant Pro to send the emails automatically and customize the email messages you send to new subscribers and when the product is back in stock.
If you don’t want to send the emails automatically, you can also do it manually. We’ll look into how to do so at the end of the article.
You can also preview both the new subscriber and stock update emails:
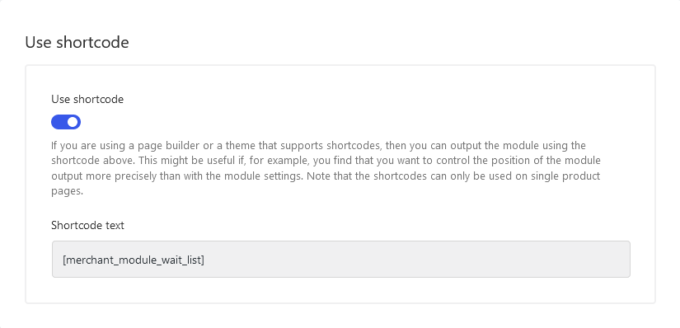
In the Use shortcode section, you can activate the
[merchant_module_wait_list]
shortcode that you can use to show the waitlist form in a custom location on your WooCommerce product pages:
After modifying all your settings, click the Save button located in the top-right corner of the page before moving on to the next step.
4. Enable the Waitlist Module
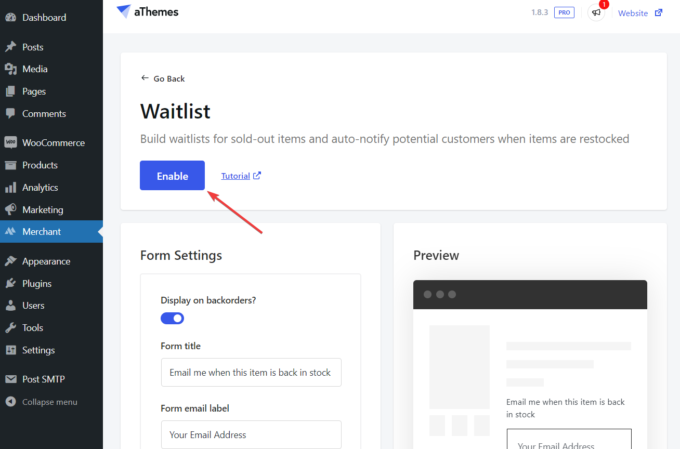
Now, it’s time to activate the Waitlist module.
All you need to do is click the Enable button at the top of the page:
5. Set Up an SMTP Plugin
By default, Merchant Pro uses the default WordPress mailer functionality.
However, if you want to improve your email deliverability rate and get access to the email logs, we recommend that you install an SMTP plugin which lets you use the Simple Mail Transfer Protocol.
By installing an SMTP plugin, any email you send from your WordPress site, including the email notifications sent by Merchant Pro, will be sent using SMTP instead of the default mailer.
Below, we’ll see how to set up the free Post SMTP plugin.
First, install and activate the plugin in your WooCommerce store.
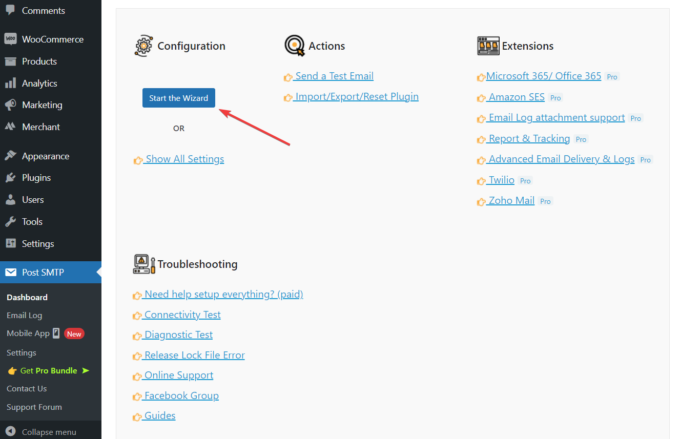
After activation, open the Post SMTP dashboard, and click the Start the Wizard button to start the setup process:
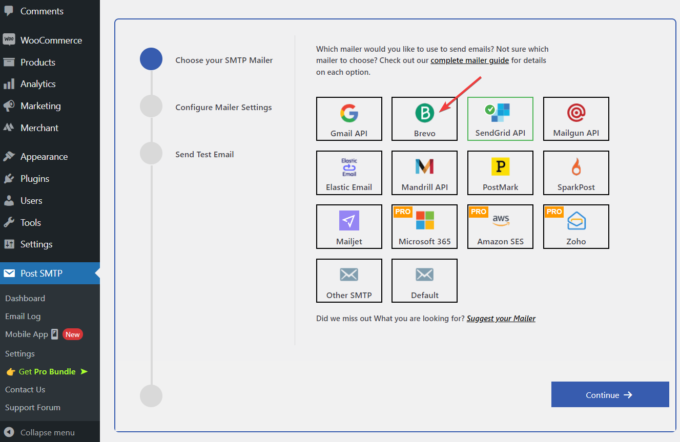
The first thing you need to do is choose an SMTP provider, such as Gmail, Brevo, SendGrid, Mailgun, etc. (you’ll also need to sign up with the SMTP provider if you don’t have an account yet).
For our demo WooCommerce store, we chose Brevo:
Next, fill in the form belonging to your SMTP provider, e.g. add your name and email address. The latter will be shown as the “send from” address in the notification emails.
You’ll also need to copy-paste your API key from your SMTP account:
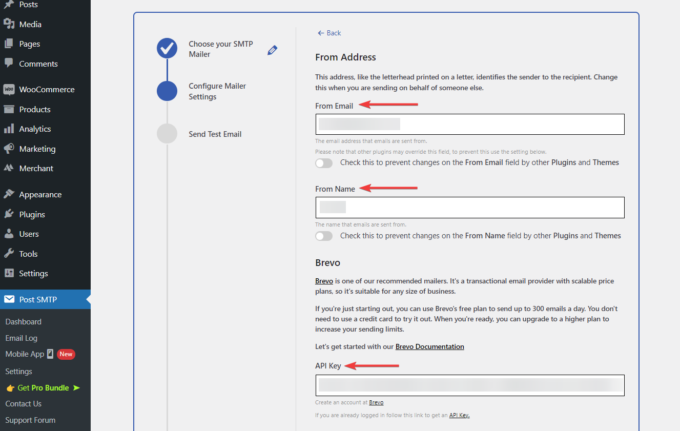
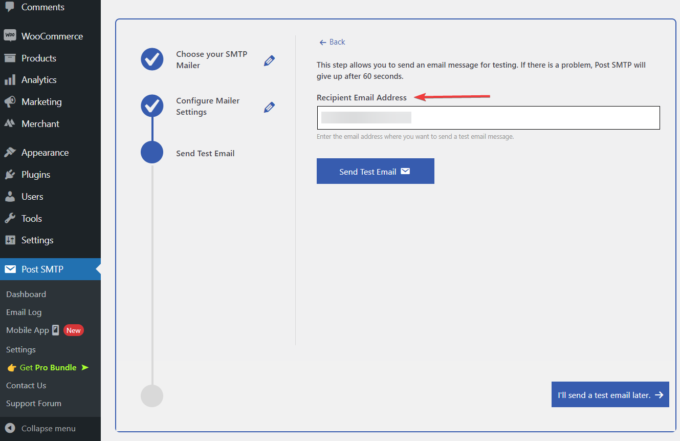
In the next step, enter a recipient email address for the plugin to send a test email, and check if you’ve received the test message:
That’s it.
Now, Merchant Pro will automatically use the custom SMTP mailer API (Brevo in our example) to email your waitlist subscribers.
How to Send the Stock Update Emails Manually
If you don’t want to send the stock update emails automatically (however, note that this is our recommended method), here’s how you can send them manually.
In your WordPress dashboard, go to Products → Waitlist Subscribers.
Here, you’ll see a list of your subscribers who are waiting to be notified when products are back in stock:
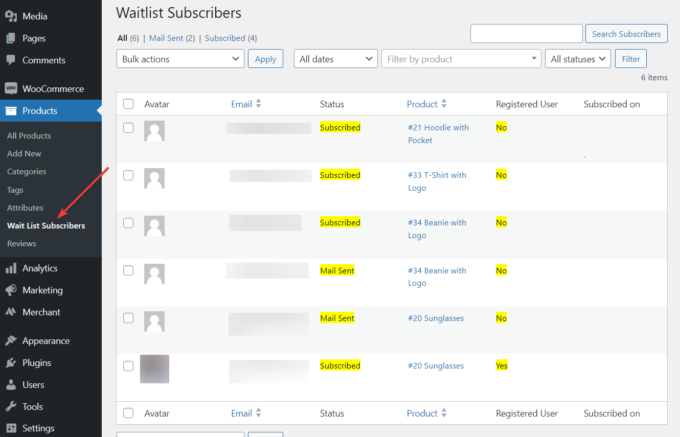
To send the stock update emails manually, select the subscribers you want to message, click the Bulk actions dropdown menu, select the Send Email option, and click the Apply button.
As soon as you do that, Merchant Pro will send the email notifications to the selected subscribers and their statuses will change from Subscribed to Mail Sent.
That’s all folks. With that, we have come to the end of this tutorial.
Wrapping Up
Adding the “Notify When Back in Stock” functionality to your WooCommerce store is a great way to encourage your visitors to return and make a purchase.
As WooCommerce doesn’t have a native feature for adding a waitlist form to your out-of-stock and backorder products, you’ll need to rely on a third-party plugin such as Merchant Pro.
To add a waitlist with Merchant Pro to your WooCommerce product pages, you need to implement the following steps:
- Install and activate Merchant Pro.
- Open the Waitlist module.
- Configure the Waitlist module.
- Enable the Waitlist module.
- Set up an SMTP plugin (optional but recommended).
- Send the stock update emails manually (optional).
Do you have any questions or suggestions about how to add “Notify When Back in Stock” on WooCommerce? Let us know in the comments section below.
