Looking for a way to add bulk discounts to your WooCommerce store?
Since WooCommerce doesn’t have this feature built-in, you’ll need a third-party plugin to add bulk discounts to your store.
In this tutorial, I’ll show you how to create bulk discounts in WooCommerce with the help of a powerful plugin called Merchant Pro.
Let’s get to it!
1. Install and Activate the Merchant Pro Plugin
To add bulk discounts to your WooCommerce store, first, you need to install and activate Merchant Pro on your WordPress site.
As Merchant Pro is a premium plugin, you first need to purchase it and then download the plugin to your computer.
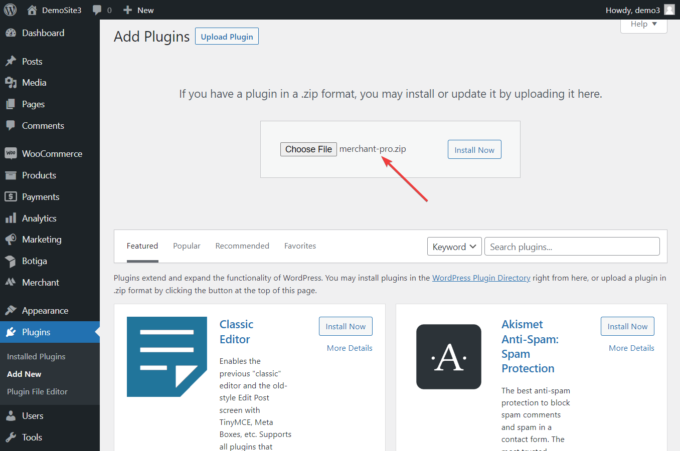
You can add the plugin to your WooCommerce store by going to Plugins → Add New Plugin → Upload Plugin → Choose File → Install Now → Activate:
You can refer to our quick start guide for more on getting set up with Merchant Pro.
2. Enable the Bulk Discounts Module
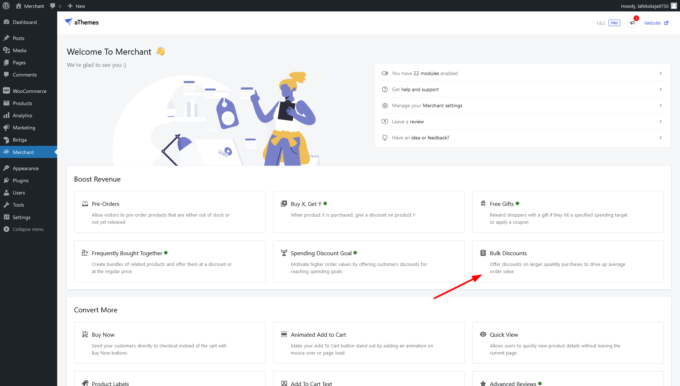
Click the Merchant menu item located in the left sidebar of your WordPress dashboard, find the Boost Revenue section, and select the Bulk Discounts module:
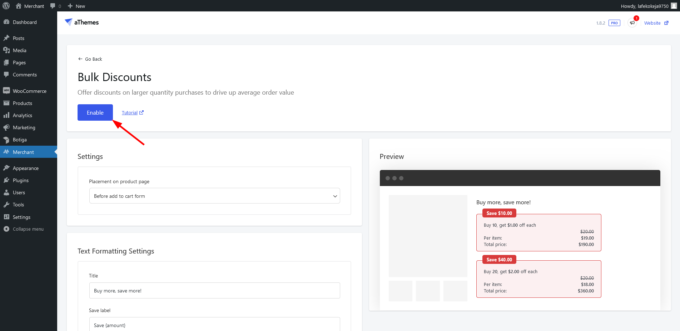
Inside the module, click the Enable button to activate the bulk discounts in your WooCommerce store:
3. Add Bulk Discounts to Your Products
After enabling the Bulk Discounts module, you need to add bulk discounts to your products.
Go to Products → All Products in your WordPress admin area and click the Edit link under the product you want to add the bulk discount to.
On the product’s admin page, scroll down to the Merchant Product Options section and click the Volume Discounts tab.
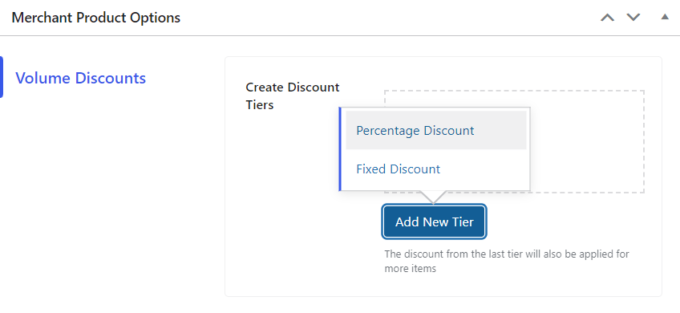
When the tab opens, click the Add New Tier button. It will reveal two options: percentage and fixed discount.
Select one of the two options:
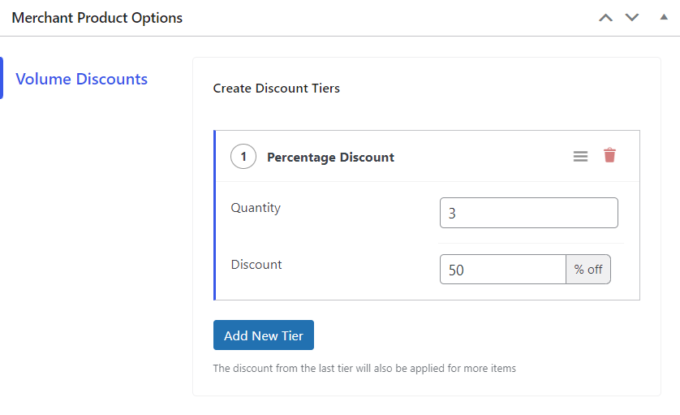
Next, add the quantity of products* and the discount percentage or fixed discount.
*Quantity here refers to the number of products the customer needs to buy for the discount. For example, if they buy three items, they get 50% off:
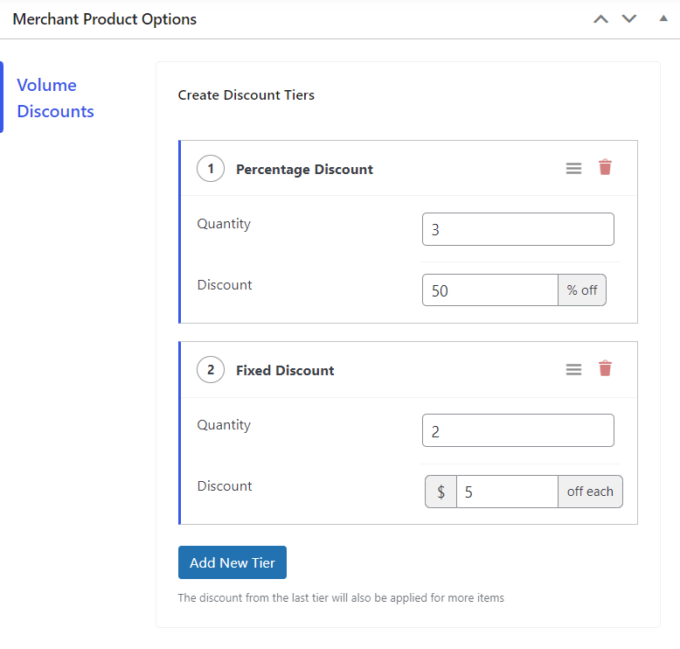
You can also add more than one discount offer to the same product and see which performs better:
Once the bulk discounts are added to the product, scroll up to the top of the page, and click the Update button to save the changes.
In the screenshot below, you can see what the bulk discounts look like on a WooCommerce product page:
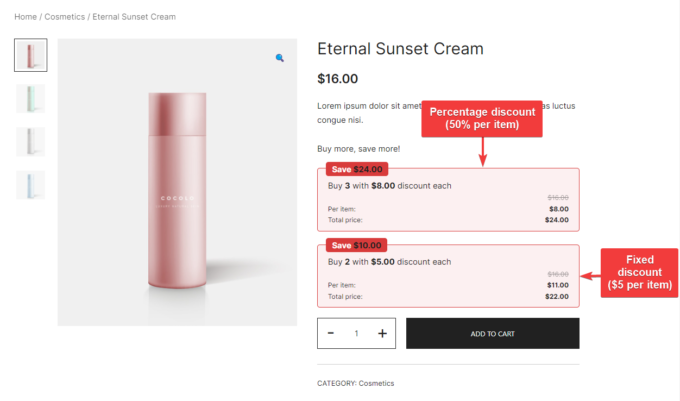
It’s worth noting that Merchant Pro automatically calculates the monetary value of the percentage discount (e.g. the first banner in the above screenshot shows $8 instead of 50%).
4. Configure the Bulk Discounts Module
Merchant Pro allows you to configure the content and design of your bulk discount boxes.
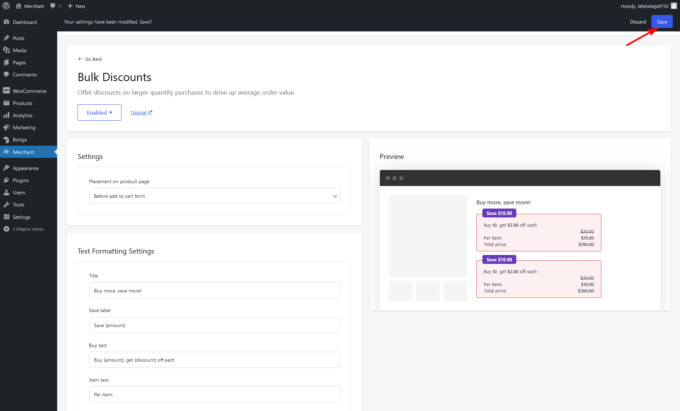
On the module’s admin page, you can change the title, label, and text strings of the banner.
You can also decide whether you want to show it before or after the Add to Cart form on the product pages:
You can also customize the color and font settings of the banner to suit your website’s brand identity and design aesthetic.
Once the settings are configured, click the Save button in the top-right corner of the page to save the changes:
Video Walkthrough
For a step by step walkthrough of how to create bulk discounts in WooCommerce using Merchant Pro, you can watch the video below:
Conclusion
Here’s a quick rundown of the four steps you need to take to add bulk discounts in WooCommerce using Merchant Pro:
- Install and activate the Merchant Pro plugin.
- Enable the Bulk Discounts module.
- Add bulk discounts to your products.
- Configure the Bulk Discounts module.
By completing the steps above, you’ll have bulk discount offers on your WooCommerce product pages in no time.
Do you have a question or suggestion about how to create a bulk discount in WooCommerce? Let us know in the comments section below.


